The one build that every E92 M3 enthusiast needs to see! The full story of “Green Hell” (Beyond OCD)
Ready to experience an E92 M3 build first hand, literally step by step showing the ENTIRE process? We put together every piece of content that we could find on Jason’s Signal Green BMW E92 M3 to show YOU what IND is capable of doing when you do things exactly how you want them done. You can shop all parts shown in this post here.
First we’ll share the perspective from the owner, Jason as he documented his entire build from the very beginning. You can follow Jason on Instagram here as well to see his car collection. Enjoy!
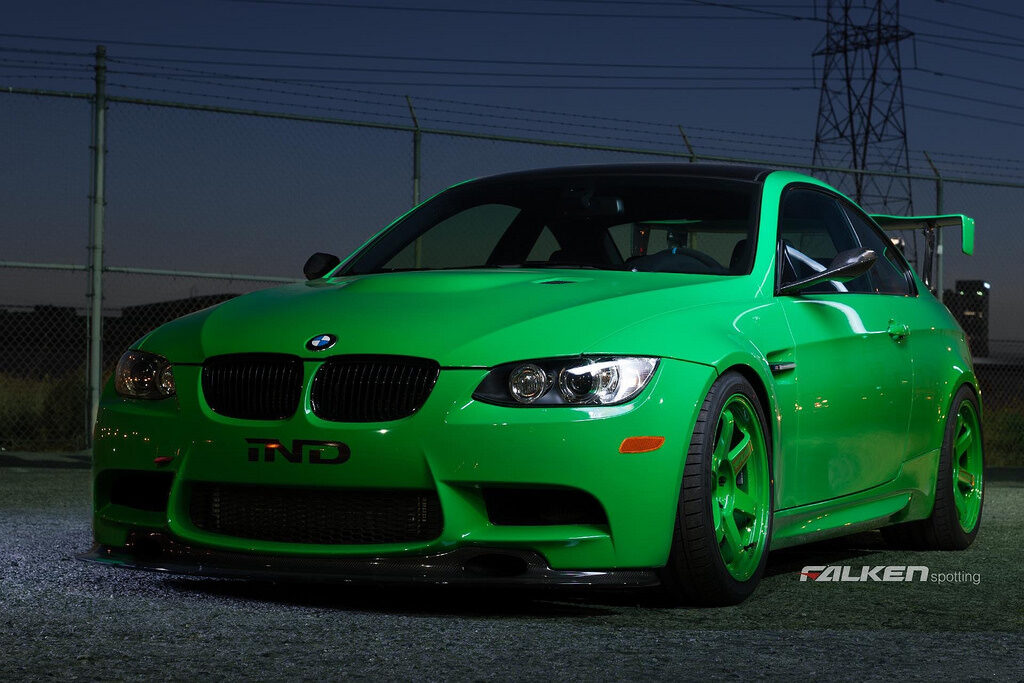
I arrived at the idea of a Porsche color when I saw a “Speed Yellow” M3 for sale on Autotrader. That, combined with INDs Green Hell, got me thinking about an individual build. After researching some dealerships I found myself sending emails to Steve Thomas BMW. They quickly responded that they could get me a Porsche RS Green M3. I honestly could not be happier with Steve Thomas. They run a great dealership with fantastic customer service. As I stated previously, I ordered this car back in May 2012!
Here she is not long after I picked her up towards the end of January this year!


A few notes, removing the stock exhaust is required for installation of the Rogue Engineering short shift kit. I combined the installation of the SSK and the exhaust system. I backed up the car up on ramps and used jack stands for the front.

Here is the OE GTS exhaust and the Challenge center section ready for install. Note how the Challenge center section is perfectly suited to connect to the OE GTS rear exhaust section. At this point it was time to install the Rogue SSK. I have to say, installing the SSK was one of my least favorite parts of the build. Being under the car for extended periods of time was not fun.
I do not have any pics from under the car. There are quite a few DIYs for SSK installs. The trickiest part is removing the carrier bushing. I re-installed the carrier bushing by placing a large wrench over the top of it and then pushing up with basically all my might until it snapped into place with a loud “flack”.
Take care when you re-install the rubber boot around the shift lever. Its hard to get it lined up correctly. With the SSK installed I bolted up the Challenge center section. Its much easier to get to the header flangs with the skid plate removed. There are six bolts around the outside of the skid plate as well as one at the center of the front center jack point. I was able to get enough room by removing the four rear bolts and the center bolt. The skid plate moved enough to give me room around the header flangs.
With the clear bra, vents, RE SSK and full exhaust system on, it was time to move to the suspension and brakes. I have never installed a big brake kit and to be honest I was not looking forward to it. Again, there are quite a few good DIYs on the forum with regards to changing brake setups ect… I used one of European Cars E90 M3 technical articles for the BBK. I could not find an actual KW Clubsport DIY but I have done a few suspension setups before and in the end the Clubsport install was fairly straight forward.
Its also worth mentioning that all the modifications in the build came from manufacturers that were trusted/respected and I was confident would work. I tried to avoid the newest gadgets and stick to parts that were reliable. I chose Brembos 380mm front and rear kit. The kit uses 6 piston calipers in the front and 4 piston calipers in the rear to maintain the correct balance and bias. Given the color of the car and green wheels with gold accents, IND and I decided it would be best to keep the brake calipers subtle. The calipers are gloss black with classic black chrome brembo logos.
Here is the finished product. I decided to loop the OE brake sensor wire to avoid getting the code or installing them into the Brembo caliper. I followed the DIY in the DIY section which was helpful. Also, notice the nice and clean hubs! I used a product called “Fluid Film”. Its a rust preventative liquid that comes in a spray can. I got the idea from someone else on this website. Apparently it has been used for years to prevent farm equipment from rusting. So far its working like a charm, however, it smells horrible!

When it came to tires I used the advice of others and chose Dunlop Direzza Sport Z1s in 275/35/18 all around. Not only is it a great looking tire, it is a great street/track tire. However, I have yet to verify the track part.

Thanks to Kaiv, I took the car to San Diego Wheel and Tire Outlet on Convoy in SD. Omar gave me a good deal and the wheels came back with zero scratches/blemishes. I will use them again!

Luckily the Clubsport camber plates have a good amount of adjustment. This was with the camber plates set at about half the max front camber possible. Fitment with the max front camber possible with the clubsports. There is some room to reduce the camber but I was playing it safe at first.

My driving impressions with the Clubsports. I set them up according to the instructions. Rebound and Bump were set in accordance with factory recommendations and they are set about an inch(ish) from full drop.
I am blown away by the everday drivability of these coilovers. Having had Bilstein Damptronics and Moton Clubsports on my 997S, the KWs are amazing. The Motons I had were arguably set up for a more track biased setup and my spring weights supported that. So comparing the KW Clubsports to the Moton Clubsports is probably not fair. What I will say is that KW did a good job setting up the Clubsports for street/track use. I could not be happier with the KWs. The real advantage of the big Brembos will not be felt until I can get on the track. For everyday they feel about the same as stock which is what I would expect. I am looking forward to feeling them after 20min on the track!
Time for the supercharger.
I wanted a setup that would be reliable and controllable on the track. The end result is the ESS VT2 535 kit currently installed on the car. Thats right, an inter-cooled 535 kit. I wanted the lowest boost ESS SC kit I could get with the added advantage of inter-cooling. I further beefed up the kit with a Motorsport24 high capacity radiator and a Motorsport24 high capacity oil cooler.
The majority of the time spent building this car was spent installing the ESS kit, M24 radiator and M24 oil cooler. The ESS instructions are awesome and very straight forward. I also found the ESS software and cable, very easy to use.

I fit the M24 coolers into the build when the ESS instructions came to a logical install point. The M24 radiator went in after I removed the front fan. Here is the stock radiator coming out. New injectors going in.
The worst part of installing the VT2 kit for me was the installation of the coolant system. Routing the hoses and mounting the heat exchanger was a continuous run of trial and error for me. Trying to figure out the best way to route the hoses.


All business when it came to the engine bay. No pretty paint in here…. not that I have anything against it.

Here is the M24 oil cooler and the OE cooler side by side. The M24 cooler is significantly larger. The software going in too.


With all the mechanical bits installed. Time for the front splitter and spoiler.

I loved the Varis wing since I first saw it on Martin Ds car. I had to have it for this build. Its one of the larger wings that I think compliments the M3s lines better than most. I know big wings are not for everyone and I will concede that the wing is probably as much for looks (for me) as it is for functionality. I just love it. I combined the wing with a Challenge CF trunk which apparently is a first for the wing and made the installation difficult. I left the wing installation and painting to the professionals at West Coast Specialties in San Diego.
I wanted something functional that worked. However, paying the premium for the OE BMW Motorsport part that would eventually get cracked or destroyed did not appear logical. So, I went with the next best thing…. The RKP GT4 front lip.
I wanted a lip that would be held securely by bolts, not tape or glue. I wanted something that would resist the high speeds that come with track duty. I further secured the bolts in place using high strength loctite.

Yes, getting the lip will be difficult but its not coming off unless its destroyed anyway. Interesting to note that BMW does not completely spray the bottom of the bumpers. You can just make out the raw PU underneath.

Time for the mirrors. This is actually pretty simple as long as you are not squeamish about pulling out interior panels. The mirror install will require removal of the door panel. However, you do not need to disconnect all the electrical bits. Just pull the panel off and set it on something (I used a cooler) in order to access the tweeter and mirror mounts.

The mirrors and Puma logo are a homage to the BMW Motorsport RLL M3 GTs that until recently raced in ALMS.

I had been looking for a suitable replacement shift knob for a while. My search took me to TWM Performance and their unique approach to a solution for BMWs. They provide a threaded adapter for the BMW shift lever that is secured with three set screws. Then the shift knob can be torqued down onto the threads of the adapter. The result is a very secure knob. I chose TWMs competition series knob and I am very happy with the product. The packaging inside is very nice. The threaded adapter is on the left.
I finished the Monster just prior to the iND photoshoot. I never had a chance to get the car aligned and to be honest, there are not a lot of options in San Diego for a good track oriented alignment/coilover setup. Furthermore, my square 275/35/18s were rubbing pretty bad at full lock. On the recommendation of M3Post member “Esquire”, I called Malek at MRF Performance. Malek was confident that he could remedy my rubbing issues and setup the car to my liking.

If you have read my build journal and iNDs post then you know my primary concern is that the car is functional and the rubbing I was experiencing did not fit into that ethos. First off, I really liked Maleks shop. For an enthusiast like me that is a DIYer and gets antsy at the idea of someone else touching their car, this place is heaven. Small, with quality equipment and the experience of a master builder. Plus, its great to just chat about cars/BMWs while the Monster received nothing but the best care.
I think I did a decent job at capturing the color. In sunlight, Signal looks much deeper while under cloudy skys it can look dark. I had initially setup the car with a lot of camber and a lot of “low”. Malek adjusted my settings to a better ride height and a much more performance oriented camber setting. I love how the car turned out after the alignment! The car feels great and best of all, it does not rub! Here she is all dialed in and ready to go! I cannot tell you enough how great my experience at MRF was. I will be going back.


After six months my car is back at MRF Engineering. As I have said before, I like to do my own work. However, in this instance the work required tools, equipment and expertise that I just do not have. I wish the weather could have been better.

I brought the beast back to MRF for something very special. About six months ago Malek and I had a discussion about the BMW OEM subframe and differential bushings. Basically, we all know the lack of rigidity in the differential bushings causes a lot of force to be placed on the differential bolt. Often these forces result in the differential bolt failing. Manual E9X M3s are especially prone to diff bolt failure.

GTS exhaust removed. Exhaust, X-pipe, brakes and subframe removed. Turner Motorsport makes solid aluminum differential bushings (at least they used to) and a solid delrin differential bolt bushing. The aluminum/delrin bushings will stabilize the differential and differential bolt against forces that could cause a failure in the mounting hardware. With the work required it made sense to also swap out the OE rubber subframe bushings for Turner Motorsport aluminum subframe bushings. Keep in mind that all new M cars and the E92 M3 GTS had solid subframe mounts. The solid subframe bushings will last forever, stabilize the suspension and protect the unibody. As you can guess, its a lengthy and an in depth process.
Here are all the rubber bushings removed. Notice the diff bolt bushing is actually made of foam. No wonder a lot of diff bolts fail. Removing these bushings the correct way is a very tricky process and requires some specialized tools. Malek has some very clever tools to make the removal of these bushings fast and safe. Solid subframe bushings installed.
So how do I feel about the solid bushings! They have to be my favorite mod after the suspension and supercharger for overall feel of the car. The solid bushings help transfer power to the ground without hesitation. Essentially there is no slop or “squat” in the rear end when power is applied. The car just moves! I love the solid bushings! I highly recommend them to anyone but especially

A nice shot of the KW suspension and 380mm Brembos. Notice I am still experiencing a tiny bit of rubbing on the front fender liner. The cause of this I will get into later but it should be a simple fix.

Here you can see the ESS cold air intake for my ESS SC setup. The kit uses a steel band reinforced flex hose that is extremely durable. But I am super anal and to avoid any excess rubbing, I put some electrical tape on the top of the tube as well as some rubbing strips at the bottom. Like I said, I am anal.
Another interesting thing you are seeing here is that the GT4 brake duct, which I have open to the under panel and thus the intake, is providing extra air to the filter as can be seen by the dirt residue seen in this pic.
I have a larger capacity Motorsport 24 radiator. Its a great piece of kit but I had it in my head that I did not properly bleed the system when I installed it. So, I decided to bleed it again (my 3rd time..told you I am anal). Although I had two reference points for tightening, I managed to over torque the bleed screw and the head popped off. Now if I had done my due diligence and conducted a google search on bleeding BMW coolant systems, I would have learned that these bleeder screws are extremely prone to breaking and a lot of care needs to be taken when tightening.

I did some research and tried a bunch of tricks to get the broken part of the bleeder screw out of the expansion tank but none of them worked. I either would have to take an extreme chance of busting the expansion tank or just start with a new one. Since they are not super expensive I decided on the latter. Time to get ready for a mess. I have done coolant work on my car a few times. Both on the engine coolant system and the SC heat exchanger system. It is always a messy job! Here is the new tank ready to go. I bought it through Turner and the tank arrived ready for install.
First up is the Motorsport 24 oil cooler. This is a fantastic product and is super easy to install. Literally 3 bolts to remove the cooler and a bolt on each side to attach the lines. However, it belongs on a car that sees far more track time than mine does. The larger cooler is also a tight fit, which bothers me but wont bother someone that is more worried about lap times.

Next, I have said for a long time that the ESS VT1-550 kit is probably the best kit offered by ESS. I personally think it offers the perfect boost in power. The VT1 kits are also completely non invasive which I will get into later. As some of you know, I have a VT2-535. At some point I realized the intercooling I added to the VT1 kit is not necessary on a car that mostly sees street time and these kits have been proven to be resistant to heat soak even on the track. So, that being said, the added complexity of the heat exchanger feels unnecessary.
But, I had obviously cut my front clip in order to install the heat exchanger. As I said before I am anal, so with the removal of the VT2 portions of my kit, I also decided to swap in a new front clip. In the above pic you can see the headlights are removed in preparation.
My RKP GT4 lip has been surprisingly robust. The first time I drove the car with the lip I figured it would be a matter a months before I destroyed it. However, its been nearly 1.5 yrs now and the lip is still going strong. That being said, the lip is slowly wearing away in a few spots on the bottom. I filled in what I could a few months ago with epoxy and then used Helicopter blade tape on top of that.

Then I went to Willow Springs raceway with a few buddies including Malek from MRF. They were using a MRF made aluminum skid plate on the bottom of their GT4 lips. I thought it was a great idea! It also showed the versatility of blind rivets (pop rivets) which I now had knowledge of after my front clip replacement.
The final product turned out great. That being said, I have OCD and there are some things I will adjust on the next skid plate. I have no idea how long this one will last but when it goes I have some things I will do differently.

Next up is cleaning. I only managed two track days in the last year but they still managed to get tire balls and dirt all over the place. Time to clean up the places that usually don’t get much attention.

I still have my Takata Green Volks but my number one favorite wheel manufacturer has always been BBS. Specifically the LM and the E88.
Thanks as always to IND and MRF for their support with my build. Forgot to thank Slicer for all is expertise on the fitment of the E88s.
Specs:
BBS Motorsport 3pc E88s 5×120
18 x 9.5 ET19 front with 275/35/18 RS3s
18 x 10.5 ET19 rear with 285/35/18 RS3s
The ET19 wheels give a nice flush fit with no spacers

13 E92 M3 with ESS VT1 550 Supercharger M1 0W-40. 1 Track day on this fill. I used TWS for the first 800mi until post break-in service. Then TWS through SC break-in until about 4K miles. However, there were multiple TWS fills during this time due to swapping out oil coolers twice. Since this is my first report there is no basis for comparison yet.

Time for some tweaking. I was getting a tiny bit of rubbing on the rear with my 285/35/18 RS3s. Clearance is actually okay but the toe setting from left to right had gotten a little out of whack causing just a tiny bit of rub on the left side.
While on jacks I noticed that the rear spring perches had become a little worn from the various adjustments over the last two years. I saw no exposed metal but I had some 3M filler laying around and figured I would feed my OCD.
So be advised this stuff will form a bond with the height adjuster. I let the stuff dry overnight before putting the height adjuster back in but it formed a bond nonetheless so if you want to avoid this go another route. Thinking about it now painting over the exposed areas and using a large rubber isolator would have worked well. I am okay with it and I doubt the bond is very strong.
Heres another thing I have been working on. When installing my ESS SC I needed to slightly re-route a wire to avoid it getting crushed between the intake and the wheel well. With its normal wire clip removed, I didn’t want it vibrating through my paint. So I added some stick on foam.

The car is over two years old now and I felt it was time to transition to the final form I wanted the car to take. The huge wing, green TEs and SC were fun but in the long run I felt I wanted something a little more OEM+. First, I contacted Malek at MRF and discussed the move to an RKP GTS/GT4 wing. With Maleks help I ordered a new E92 trunk lid that would have welded in reinforcements for the wing.
As you can see the RKP reinforcements are welded to the structure of the trunk lid. Very sturdy! MRFs paint guy did a great job matching both the exterior color but also the matte under coat. I chose the flat black version of the wing as it best represented an authentic GT4/GTS wing. And, I think it flows nicely with the signal green paint. This is the first time the car has been at MRF since the new wheels and RS3s. Time for an alignment check. As expected, I had fallen out of spec due to some changes I had made in ride height and camber.
Having the car on the lift and a good tire shop down the street gave me an opportunity to have the wheels re-balanced with a road force machine. No more pesky vibration. Now I loved the SC and I still believe the ESS 550 is one of the best kits on the market. But, I had always intended for this car to be NA over the long haul. I had saved just about every tiny part when I installed the SC. Even this connector housing that had to be removed for integration with the ESS manifold. Its all about the details.

Well I am not going all the way back to stock with the motor. Here is the Dinan intake side by side with the OE intake.

I purchased some HRE classics not long ago. The HRE craftsmanship is some of the best I have ever seen in a while. The attention to detail is insane. Nice thing about HRE is being able to spec my own wheels the way I wanted them.

18 x 10 and 18 x 11 ET25 front and rear. Fat rubber 275/295 filling out the arches. As much as I love the HREs they are for sale and I am going back to the original look.


I have been asked a few times about my wheel detail process I did on my “re-acquired” Takata Volks. They came back to me pretty dirty with a lot of road grime and rubber on them. The first layer of grime on the inside and outside of the wheel was easily removed with bug and tar remover. I had a bottle of Turtle laying around but simple green would probably work just as well.
I used a combo of things to get the rubber off but it wasn’t easy and it was time consuming. I sprayed on a thick coat of the bug and tar remover and let sit for a while. Then I took Menzurna FG400 and went to work. I then took the same FG400 to the faces. The Volk paint is somewhat soft and hand polishing worked out well. Below is after one pass by hand. You can still see some small swirls but they came out after a few more passes. I had a few areas where I used the heavy cut 300 and then passed over again with FG400.
You can see in the previous pic that I used Tamiya model paint for touch up. Volk doesn’t sell touch up paint or release their paint code. But I find in these instances, I can always get close with the plethora of model paints on the market. Here is the valve stem hole. You won’t really see these blemishes with the stem attached but I am OCD and touched them up with a very small brush.
I sold the HREs after arriving to my new home in TX. And put the TEs back on. Love these wheels and they work well with the more subtle GTS wing. I also sent the car to MRF Engineering before the move to TX to get the rod bearings done and to change out the front control arms for Dinan mono-ball units. Excellent service as usual from MRF.

Not sure why I waited so long for such a simple modification. IND did a great job with the color match and the quality is very nice. I especially like the stick on spacers and color matched caps.
It looks as if Jason hasn’t updated too much recently on what else he’s done, but I found his Flickr with some updated photos. I believe he put the car on air suspension? You can see all his Flickr Photos here, which it looks like he’s also currently building a 993 Porsche! I’ve included a batch of photos here too that I found online.
Here’s a list of parts throughout the build – SHOP HERE
OEM BMW Edition Grill Set
Front Clear Bra
RE SSK
Macht Schnell Shift Knob
iND Shifter extension
AMS Shift Knob
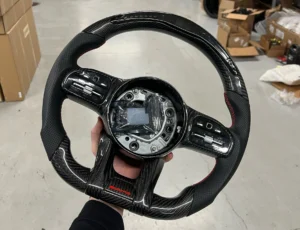
OEM BMW Sports Steering Wheel
OEM GTS Exhaust
Challenge Sport X-Pipe
Brembo F/R 380mm BBK
KW Clubsports
Volk Takata TE37s
Macht Schnell TPMS Emulator
ESS VT2 535 SC
Motorsport 24 Radiator
Motorsport 24 Oil Cooler
RKP GT4 Front Splitter
VARIS GT Wing
Challenge CF/Kevlar Trunk Lid
OEM BMW Motorsport ALMS Mirrors
OEM BMW Edition Grill Set
Front Clear Bra
RE SSK
OEM GTS Exhaust
Challenge Sport X-Pipe
Brembo F/R 380mm BBK
KW Clubsports
Volk Takata TE37s
Take a look at the story from IND below!
Our Portfolio program once again proves my long-held belief that the folks we get to meet through our time at IND are the absolute best single perk of this job. To earn and modify a BMW M3 is no easy task and takes effort and dedication. Each of our clients has an amazing story to tell, and the opportunity to tell their story through their M3 is unique to our industry.

We are pleased to present Jason’s interpretation of the perfect M3. This BMW Individual Signal Green M3 is a reflection of Jason’s passions, experiences, and life, and his personality is clear in every part added.
Jason is no stranger to modified cars, having previously owned a number of great sports cars, including most recently a 911 Porsche extensively modified with many GT3 suspension and body components. The journey of creating a great modified car is part of the appeal for Jason, and so unlike most IND Portfolio projects, every single component seen on this E92 M3 was installed in Jason’s own garage. Although IND provided consultation throughout the process, Jason installed each and every part by hand, pouring his own blood and sweat into his M3.

Jason’s experience as a pilot for the Marine Corps contributed to his willingness to take on an ambitious project like this, with the patience and discipline learned in the Marine Corps allowing him to tackle the installation of the KW ClubSport coilovers, the ESS VT2 kit, Brembo brakes, and exterior components seen on the car.
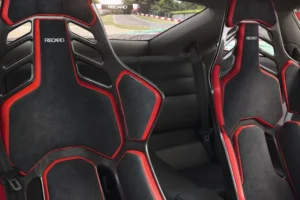
This M3 takes a “less is more” approach to tuning in many ways, with Jason opting for a smaller selection of the best possible parts, rather than replacing as much of the original M3 as possible. The car was originally ordered in Porsche’s striking Signal Green color directly from BMW Individual with as few options added as possible, including BMW’s excellent speed cloth interior. With no additional luxury features, this M3 was destined to be a serious sports car from the moment it’s build order was signed.
Continuing with the plan of adding as few parts as possible to create his desired effect, this M3 forgoes many of the “go-to” modifications often seen on cars of this caliber- no painted ESS intake manifold, the original orange reflectors, no rear diffuser. These components were skipped intentionally, forcing the eye to focus on the amazing components that did make it on the car. The M3 is a showcase of nothing but the best from each manufacturer- RKP’s amazing GT4 style front lip, a GT wing from Varis, and the original exhaust system from the M3 GTS as built for BMW by Boysen.
More than any other item seen on this M3, the car’s focal points are surely the mirrors. The full carbon fiber mirrors bolted to the doors of this M3 were a key aspect of the build from the beginning, and Jason knew that acquiring a set directly from BMW Motorsport would perfectly suit the car’s aggressive appearance. Designing the custom bases required to mate the BMW Motorsport mirrors to the M3 was an amazing journey in itself.
I believe that Jason has succeeded in creating his perfect M3- a striking mix of dramatic race-inspired looks, supercar performance levels, and enough comfort to continue driving the M3 on weekend journeys.
This weekend two members of the IND team flew to beautiful San Diego to review the car, get feedback on all of the parts, and document the car in its element in the city and mountain roads of southern California.

Now that’s a build!!!!
Hope you enjoyed that mega-post!
You can shop all parts by visiting the IND website here!